Are you tired of constantly changing the font from Arial to your preferred choice every single time you open a new document in Google Docs? It’s a small frustration, but it adds up! 😩
If you want all your new documents to automatically start with your perfect font and heading styles, you’ve come to the right place. We’ve created a quick and easy-to-follow video tutorial that shows you exactly how to set your custom styles as the new default. This simple trick will save you a ton of time and keep all your documents looking consistent. 🚀
What You’ll Learn in the Video 🔎
Our video gets straight to the point and shows you everything you need to know. In this tutorial, you will learn:
✅ How to find the Styles option in Google Docs.
✅ How to save your custom Title, Subtitle, Normal text, and Heading styles.
✅ How to set these styles as your default for all future Google Docs.
Watch the full step-by-step guide on YouTube! 👇 https://youtu.be/x81o4UffUvg
How to Set Your Default Styles ✨
For those who like a quick written guide, here are the basic steps:
- Style Your Text: First, type some text for each style you want to change (Normal text, Title, Headings, etc.). Format them exactly how you like them (e.g., set “Normal text” to Times New Roman, 12pt).
- Update the Styles: Highlight your newly formatted “Normal text.” Go to the Styles dropdown menu in the toolbar (it usually says “Normal text”), click the right arrow (>), and select ‘Update Normal text to match’. Repeat this for your “Title,” “Heading 1,” and any other styles you customized.
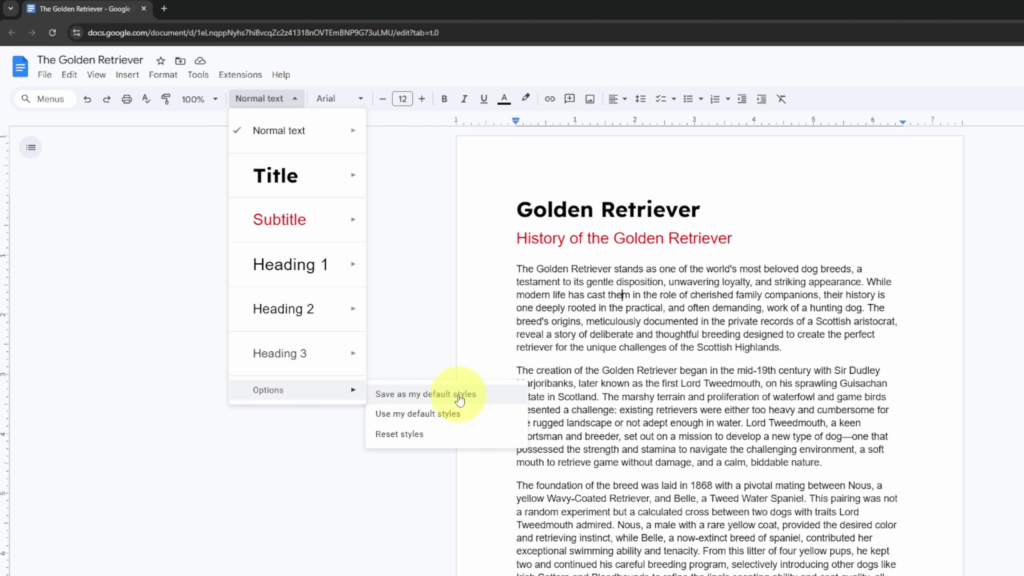
- Save as Default: Once all your styles are updated in the menu, go to Format > Paragraph styles > Options > ‘Save as my default styles’.
That’s it! Now every new Google Doc you create will automatically have your preferred fonts and styles. For a clear visual walkthrough of the entire process, be sure to check out the full video guide!