Is the bright white screen on your Mac hurting your eyes? Whether you’re working late at night, prefer a darker appearance, or simply like the sleek look of macOS Dark Mode, changing the setting only takes a few clicks.
In this tutorial, I’ll show you how to turn on Dark Mode on your Mac and explain the differences between the available appearance settings in macOS.
What You Will Learn
- 🌙 How to turn on Dark Mode on your Mac
- ⚙️ Where to find the Appearance settings in macOS
- ☀️ The difference between Light Mode and Dark Mode
- 🌓 How to use the Auto setting to switch themes automatically
- 💻 How to customize the appearance of your Mac in just a few clicks
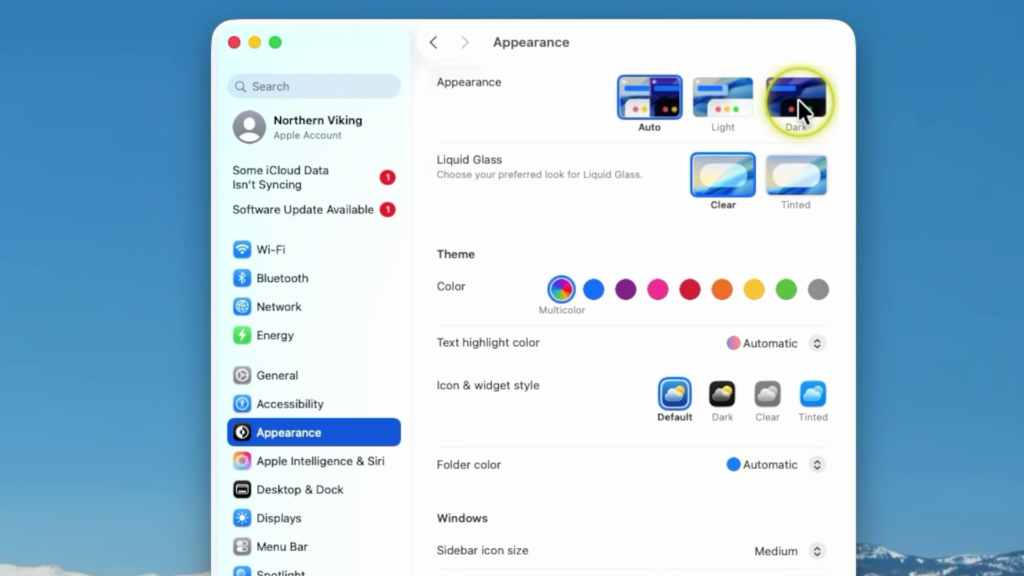
To enable Dark Mode, start by opening System Settings on your Mac. From there, select Appearance from the menu on the left side of the screen.
At the top of the Appearance settings, you’ll find three options:
- Light – Uses the standard light appearance.
- Auto – Automatically switches between Light and Dark Mode based on the time of day.
- Dark – Applies a dark appearance across macOS.
Simply select Dark to immediately switch your Mac to Dark Mode.
If you’d rather have your Mac automatically change between Light and Dark Mode throughout the day, you can choose the Auto setting instead. This option uses a light appearance during the day and switches to dark mode at night.
Dark Mode can make your screen more comfortable to view in low-light environments and gives macOS a clean, modern appearance that many users prefer.
▶️ Watch the full video tutorial here:
https://youtu.be/PxnEZftm2fM
Related Tutorials
🔹 How to Make the Menu Bar Always Show on Mac
https://northernvikingeveryday.com/make-menu-bar-always-show-mac/
🔹 How to Change Mouse Scroll Direction on Mac
https://northernvikingeveryday.com/change-mouse-scroll-direction-mac/
🔹 How to Set Up the Mac Mini M4
https://northernvikingeveryday.com/how-to-set-up-mac-mini-m4/