Need to remove an unwanted section from the middle of a video on your Mac? You don’t need expensive video editing software! QuickTime Player, which comes preinstalled on macOS, lets you split a video, delete unwanted footage, and save your edited video in just a few simple steps.
Whether you’re removing a mistake, cutting out an unnecessary scene, or shortening a video, here’s how to do it for free.
🎬 Watch the Video Tutorial
Follow along with my step-by-step YouTube tutorial:
✂️ How to Remove the Middle of a Video Using QuickTime Player
- Open QuickTime Player on your Mac and select the video you want to edit.
- Find the beginning of the section you want to remove by moving the playhead along the video timeline.
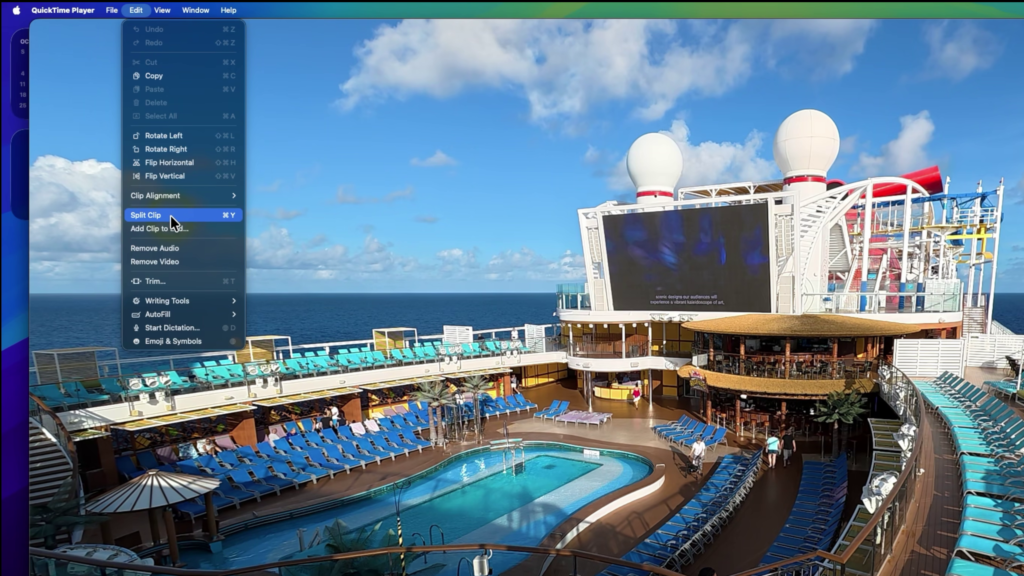
- From the menu bar, select Edit > Split Clip, or press Command + Y.
- Move the playhead to the end of the unwanted section and select Edit > Split Clip again.
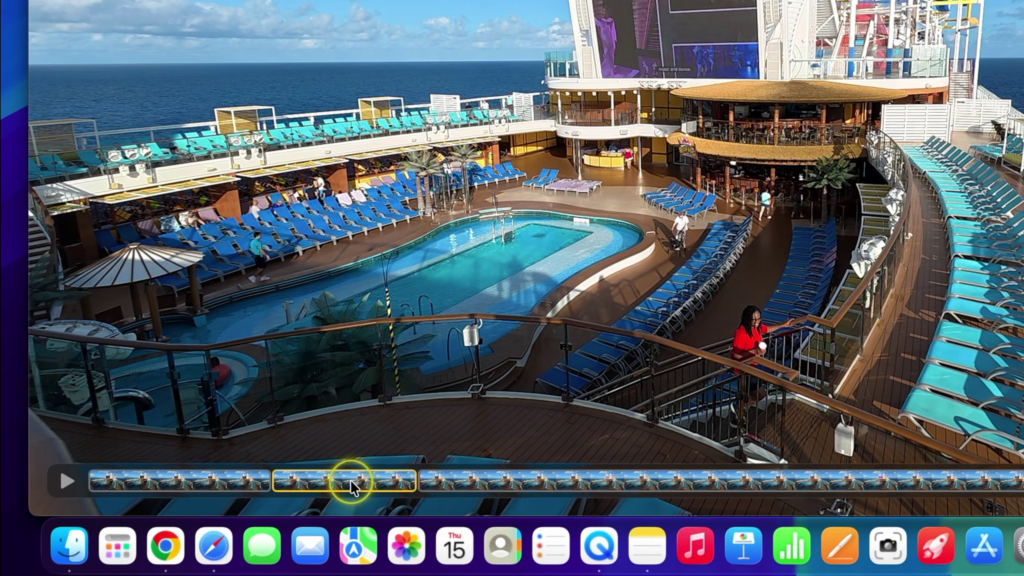
- Click the unwanted middle clip to highlight it in yellow, then press Delete on your keyboard.
- Click Done to finish editing.
- Select File > Save, choose a filename and location, and save your edited video.
That’s it! Your new video will play without the unwanted middle section.
💡 Why Use QuickTime Player?
QuickTime Player is a great option for basic video editing because it’s free, already installed on your Mac, and doesn’t require learning complicated editing software.
It’s especially useful when you only need to remove a short section of footage rather than edit an entire video.
If you only need to remove footage from the beginning or end of a video, QuickTime Player also has a simple Trim feature.
✅ Final Thoughts
Removing the middle of a video on Mac is surprisingly easy with QuickTime Player. Just split the video at the beginning and end of the unwanted footage, delete that section, and save your changes.
For a visual walkthrough, be sure to watch my full tutorial above!
🔗 Related Mac Tutorials
For more helpful Mac tutorials, check out these guides: