Have you ever lost your mouse cursor on a bright screen or just felt like the standard white pointer was a bit boring? Windows 11 makes it incredibly easy to customize your cursor for better visibility or a bit of personal flair. 🖱️✨
In this guide, I will walk you through the exact steps from my latest video to help you change your mouse pointer color and size without any extra software.
Step 1: Open Your Windows Settings
The fastest way to get started is to head down to your Start menu at the bottom of your screen. Instead of the usual left click, right click on the Start button. A small menu will pop up where you can select Settings. ⚙️
Step 2: Navigate to Accessibility
Once you are in the Settings menu, look at the list on the left hand side. Find and select the Accessibility option. This section contains all the tools for customizing how you interact with your PC.
Step 3: Find Mouse Pointer Settings
Inside the Accessibility menu, scroll down until you reach the Interaction section. Click on Mouse, then look toward the bottom under Related settings to find Mouse pointer. This is where the magic happens! 🖱️🎨
Step 4: Choose Your Style and Color
In the Mouse pointer menu, you have four main styles to choose from:
- White: The classic default look.
- Black: A solid black cursor that stands out on light backgrounds.
- Inverted: A clever mode where the cursor turns black over white areas and white over black areas.
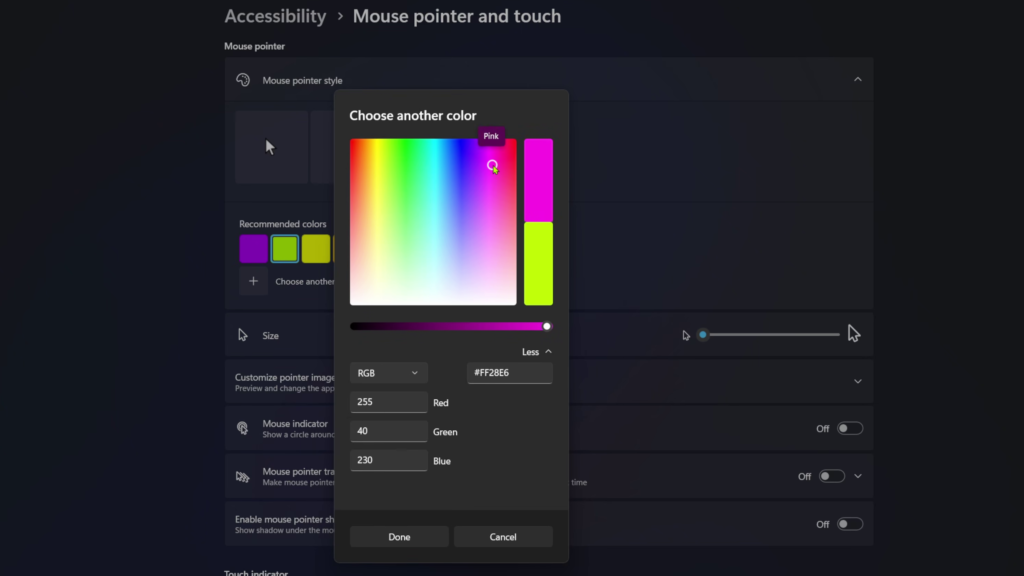
- Custom: This allows you to select from a variety of bright colors. 🌈
If you want something truly unique, click the plus (+) sign next to Choose another color. You can pick any shade from the rainbow or even click More to enter a specific color code for the exact look you want.
Step 5: Adjust the Size (Optional)
While you are there, you can also use the slider to change the size of your pointer. Whether you want a massive cursor that is impossible to lose or a tiny, precise one, just slide it until it feels right for you! 📏
Watch the Full Video Tutorial
If you want to see these steps in action, check out my full video below for a complete walkthrough!
Watch Here: How to Change Mouse Pointer Color in Windows 11 🚀
It really is that simple to make Windows 11 look and feel exactly how you want. If this guide helped you out, consider subscribing to the channel for more quick tech tips! 💻🙌